

 Alex Genovese
In this article, I will show you how to merge data from different sources, using information provided by Google Analytics and merging them in Google Data Studio.
Google Analytics Settings
Let's start with the first Google product! Open the e-commerce analytics and click on administration link, at the bottom left of the side menu. Then, in the central column, looking for the link "Custom definitions / Custom sizes".
We are going to create custom dimensions that will allow us to merge data in Data Studio through a conjunction key.
By clicking on "+ New Custom Size", we create a new dimension, as shown below:
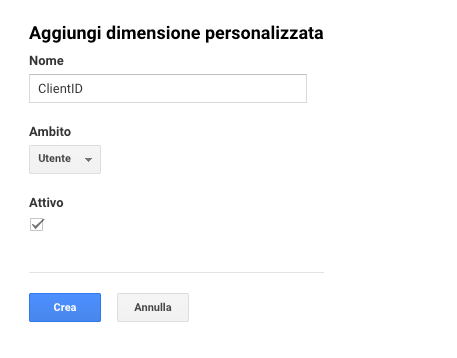
This dimension will allow us to associate a random ID for each user generated by a custom function that we will create shortly.
How to associate CRM or CDP data to Google Analytics
In order to merge GA data to CRM or CDP (Customer Data Platform) we must create an additional customized dimension, as shown in the previous steps, creating UserID variable name.
We can add to UserID our CRM Customer ID or his email, allowing us to explore and going deeper in our data when exported in Data Studio or whatsoever.
Oh, I was forgetting, you could create some interesting personalized reports in GA too, using this dimension...or, perhaps, you can integrate other sources for a better enriching.
You can easily set (in UserID) user email when he's going to type it too:
- subscribe to the newsletter;
- make a purchase;
- start a conversation via live chat or chatbot;
- when logging in or registering.
A valid alternative for creating variables using Google Analytics is Tag Manager, as shown below:
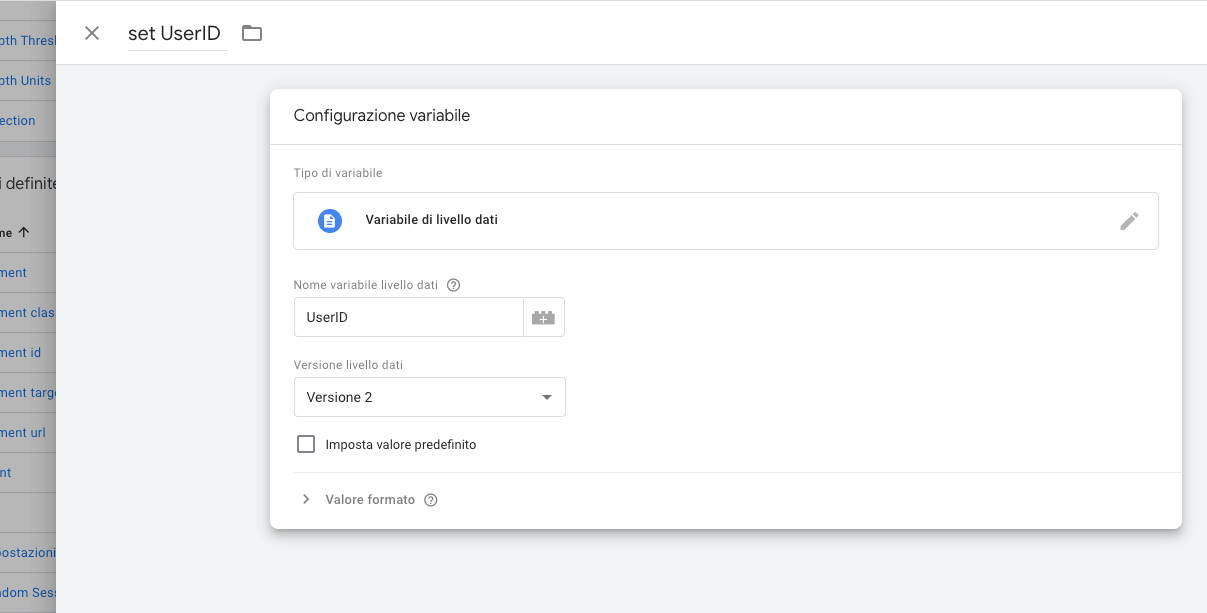
Now all we have to do is adding a value to the variable when we deem it most appropriate, using the following script at the time of its valorization:
dataLayer.push({'UserID': '## User ID or Email ##'});
Adding value to custom dimension via javascript
Alternative way to set value in custom dimension
Just embedding this following javascript you're able to set the value into custom dimensions:
ga('set', 'dimension2', UserIDValue);
Shopify Commerce – Adding value to ClientID and UserID
With the following function it'll be possible to add to ClientId a random value and Shopify Customer ID to the UserID.
ga(function(tracker) {
    var clientId = "GA" + String(tracker.get("clientId"));
    ga("set", "dimension1", clientId);

    if (__st["cid"]) {
        ga("set", "dimension2", "shopify" + String(__st["cid"]));
    }
});
Tag Manager
For those unfamiliar with the advantages of this powerful tool, here is an excerpt from the official website:
"Google Tag Manager is a tag management system (TMS) that allows you to quickly and easily update measurement codes and related code fragments collectively known as tags on your website or mobile app. Once the small segment of Tag Manager code has been added to your project, you can safely and easily deploy analytics and measurement tag configurations from a web-based user interface."
– Link to the page
Adding value to the first custom dimension: ClientID
Opening our "Default Workspace", select "Variables" from the side menu:
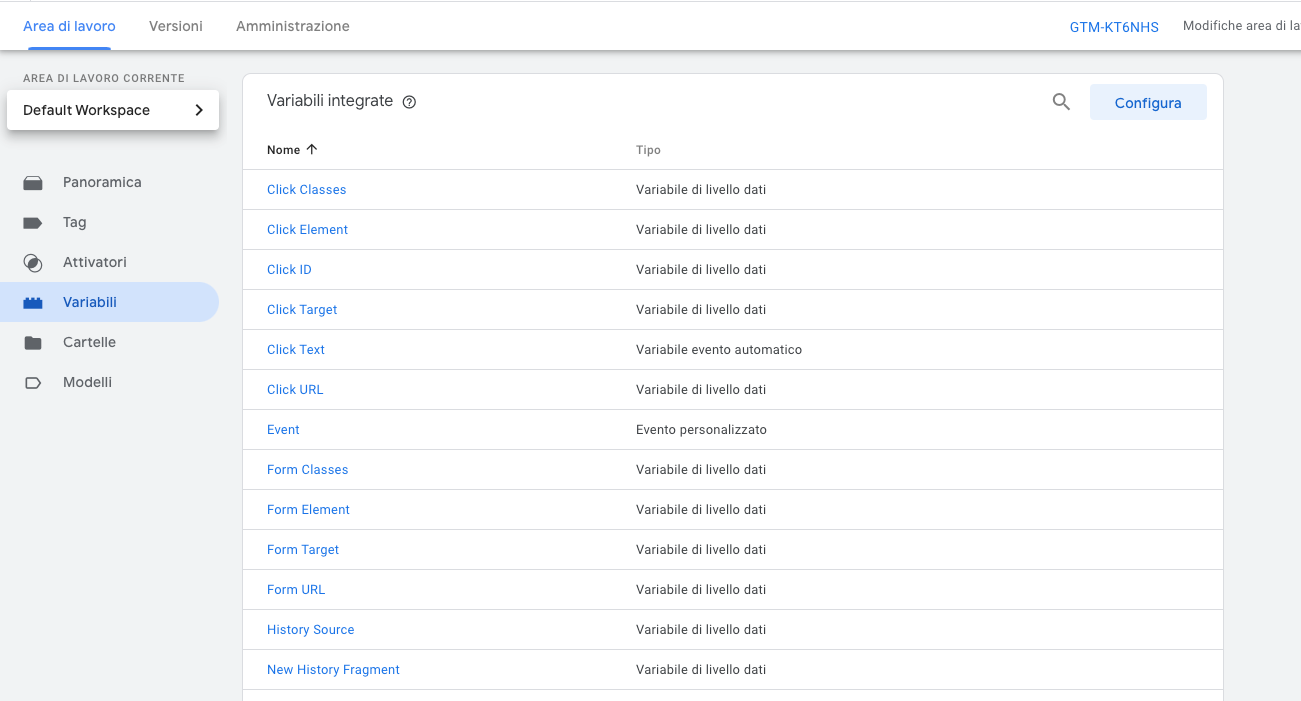
Scrolling down the page, where are situated the user variables, and click on "New" to create one.
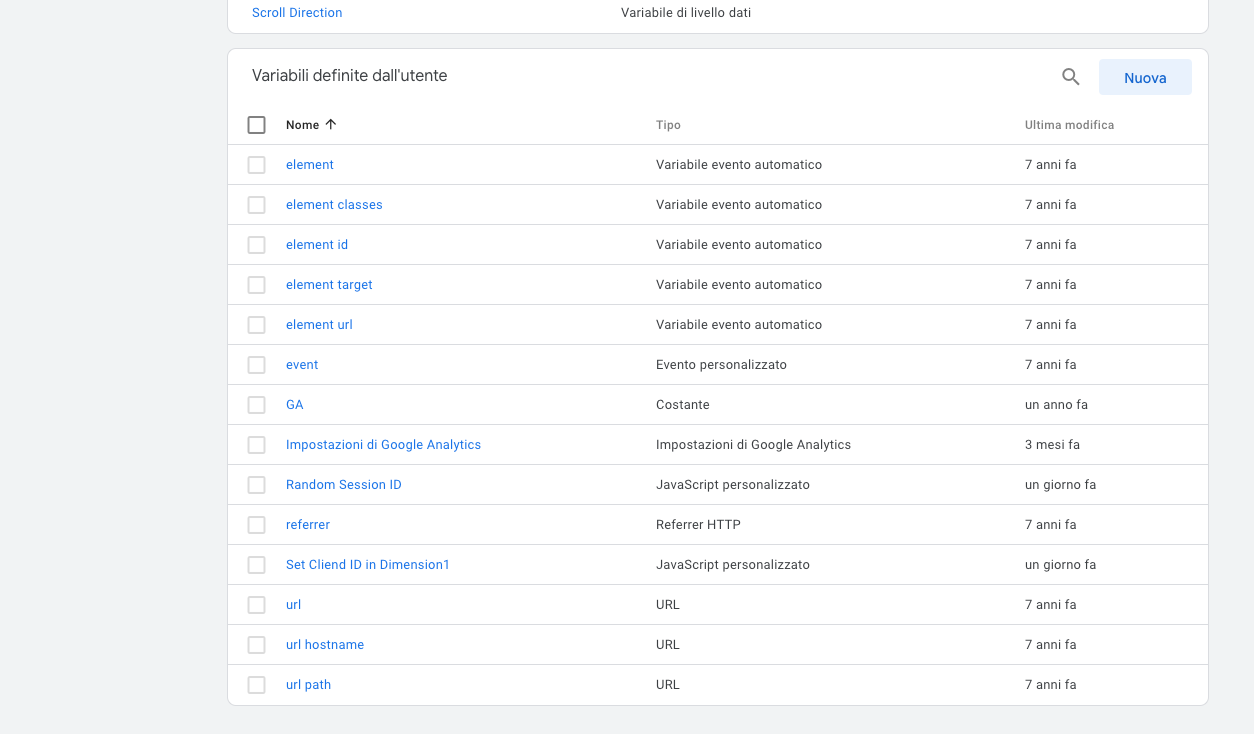
Then select "Javascript variable" as "Variable Type" and insert the code that will allow us to randomly create a UserID for the each user browsing our site.

When this function will be called, it'll set the dimension1 = GAoa87stydoa8sdyct.
NOTE – An aspect that should not be underestimated is the retention of user data and the cookie expiration time which you can find in "Monitoring Information / Data Retention" in Google Analytics Settings.
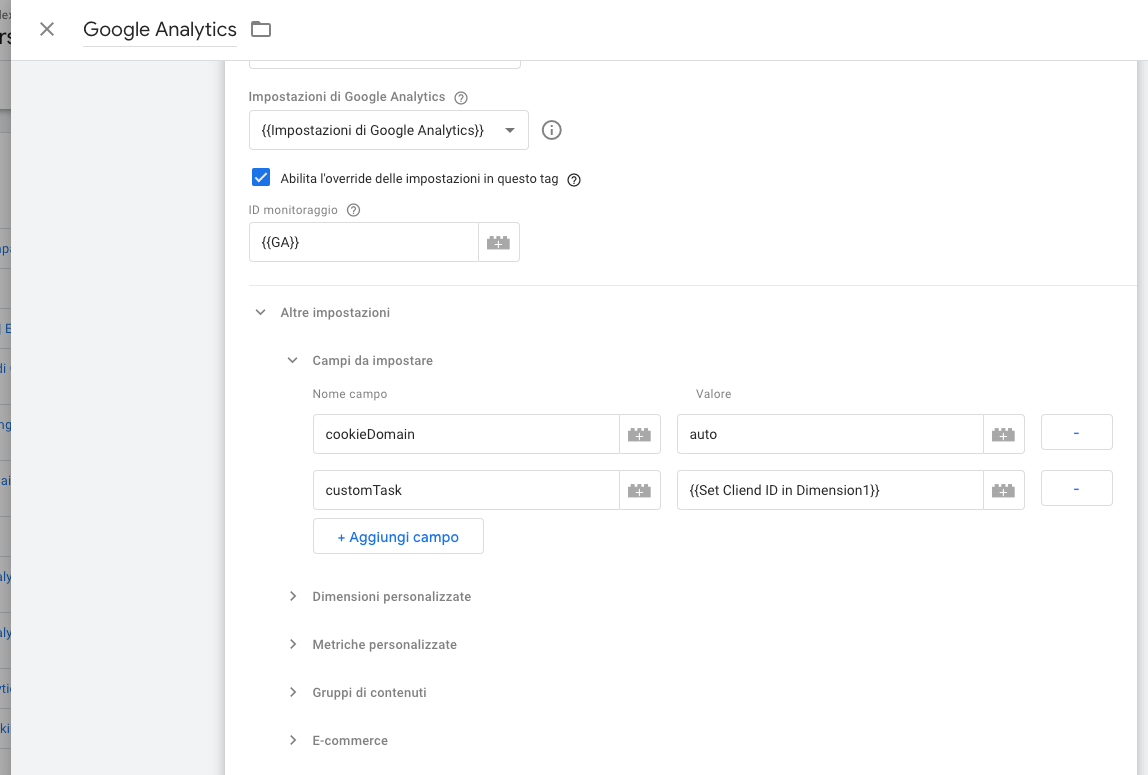
Google Analytics Advanced Settings in Tag Manager
For those who have never configured Google Analytics through Tag Manager, I refer to the official guide that explains very well how to do it.
By opening the Google Analytics tag we must go to value dimension1 (in my case) with a random value generated by the function we created previously.
Let's set the "Other Settings" in the tag as follows.
Congratulations!
Now you have set a unique ID for each user and associated the email of your customers to users recognized by Google Analytics.
Visualize data in Data Studio
Opening Data Studio, click on "New / Report" and from the top menu select "Add Data", which will open a modal with the possibility of integrating many other sources.
Select Google Analytics and proceed by selecting the e-commerce data we want to merge.
Always clicking on "Add Data", we are going to integrate our new data source which could be in Google Big Query, from a MySql database, Google Sheet or from other 280 connectors.
In this example, I used a data export from a Google Sheet, where I previously calculated the RFM matrix, whose union key will be the customer email.
Just drag-and-drop the respective keys in order to then manipulate and view the data in the various formats that interest you most.
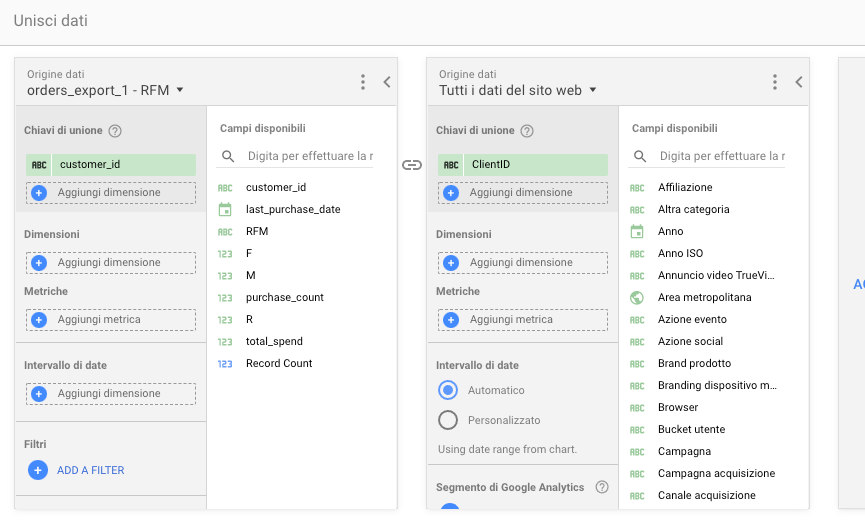
Here, I will get all information about my customers insights from Google Analytics data and from my own sources. I can exploding the data of origin and acquisition, the interests of the devices they use, associating this data to the RFM analysis that provides me information related to their spending potential.
You can get more complex integrations, creating a real command console of your business! I will explain this in the next article that will also cover the Marketing Data Cycle.
Sign up to the newsletter, to stay tuned!